Setting up students
Before students can start training, they must first be created in the Training Workx portal.
This allows the system to track training progress and results for each student.
You can access the portal at:
- Logistic Workx: portal.logisticworkx.com
- Cleaning Workx: portal.cleaningworkx.com
1. Create a student
- Log in to the portal.
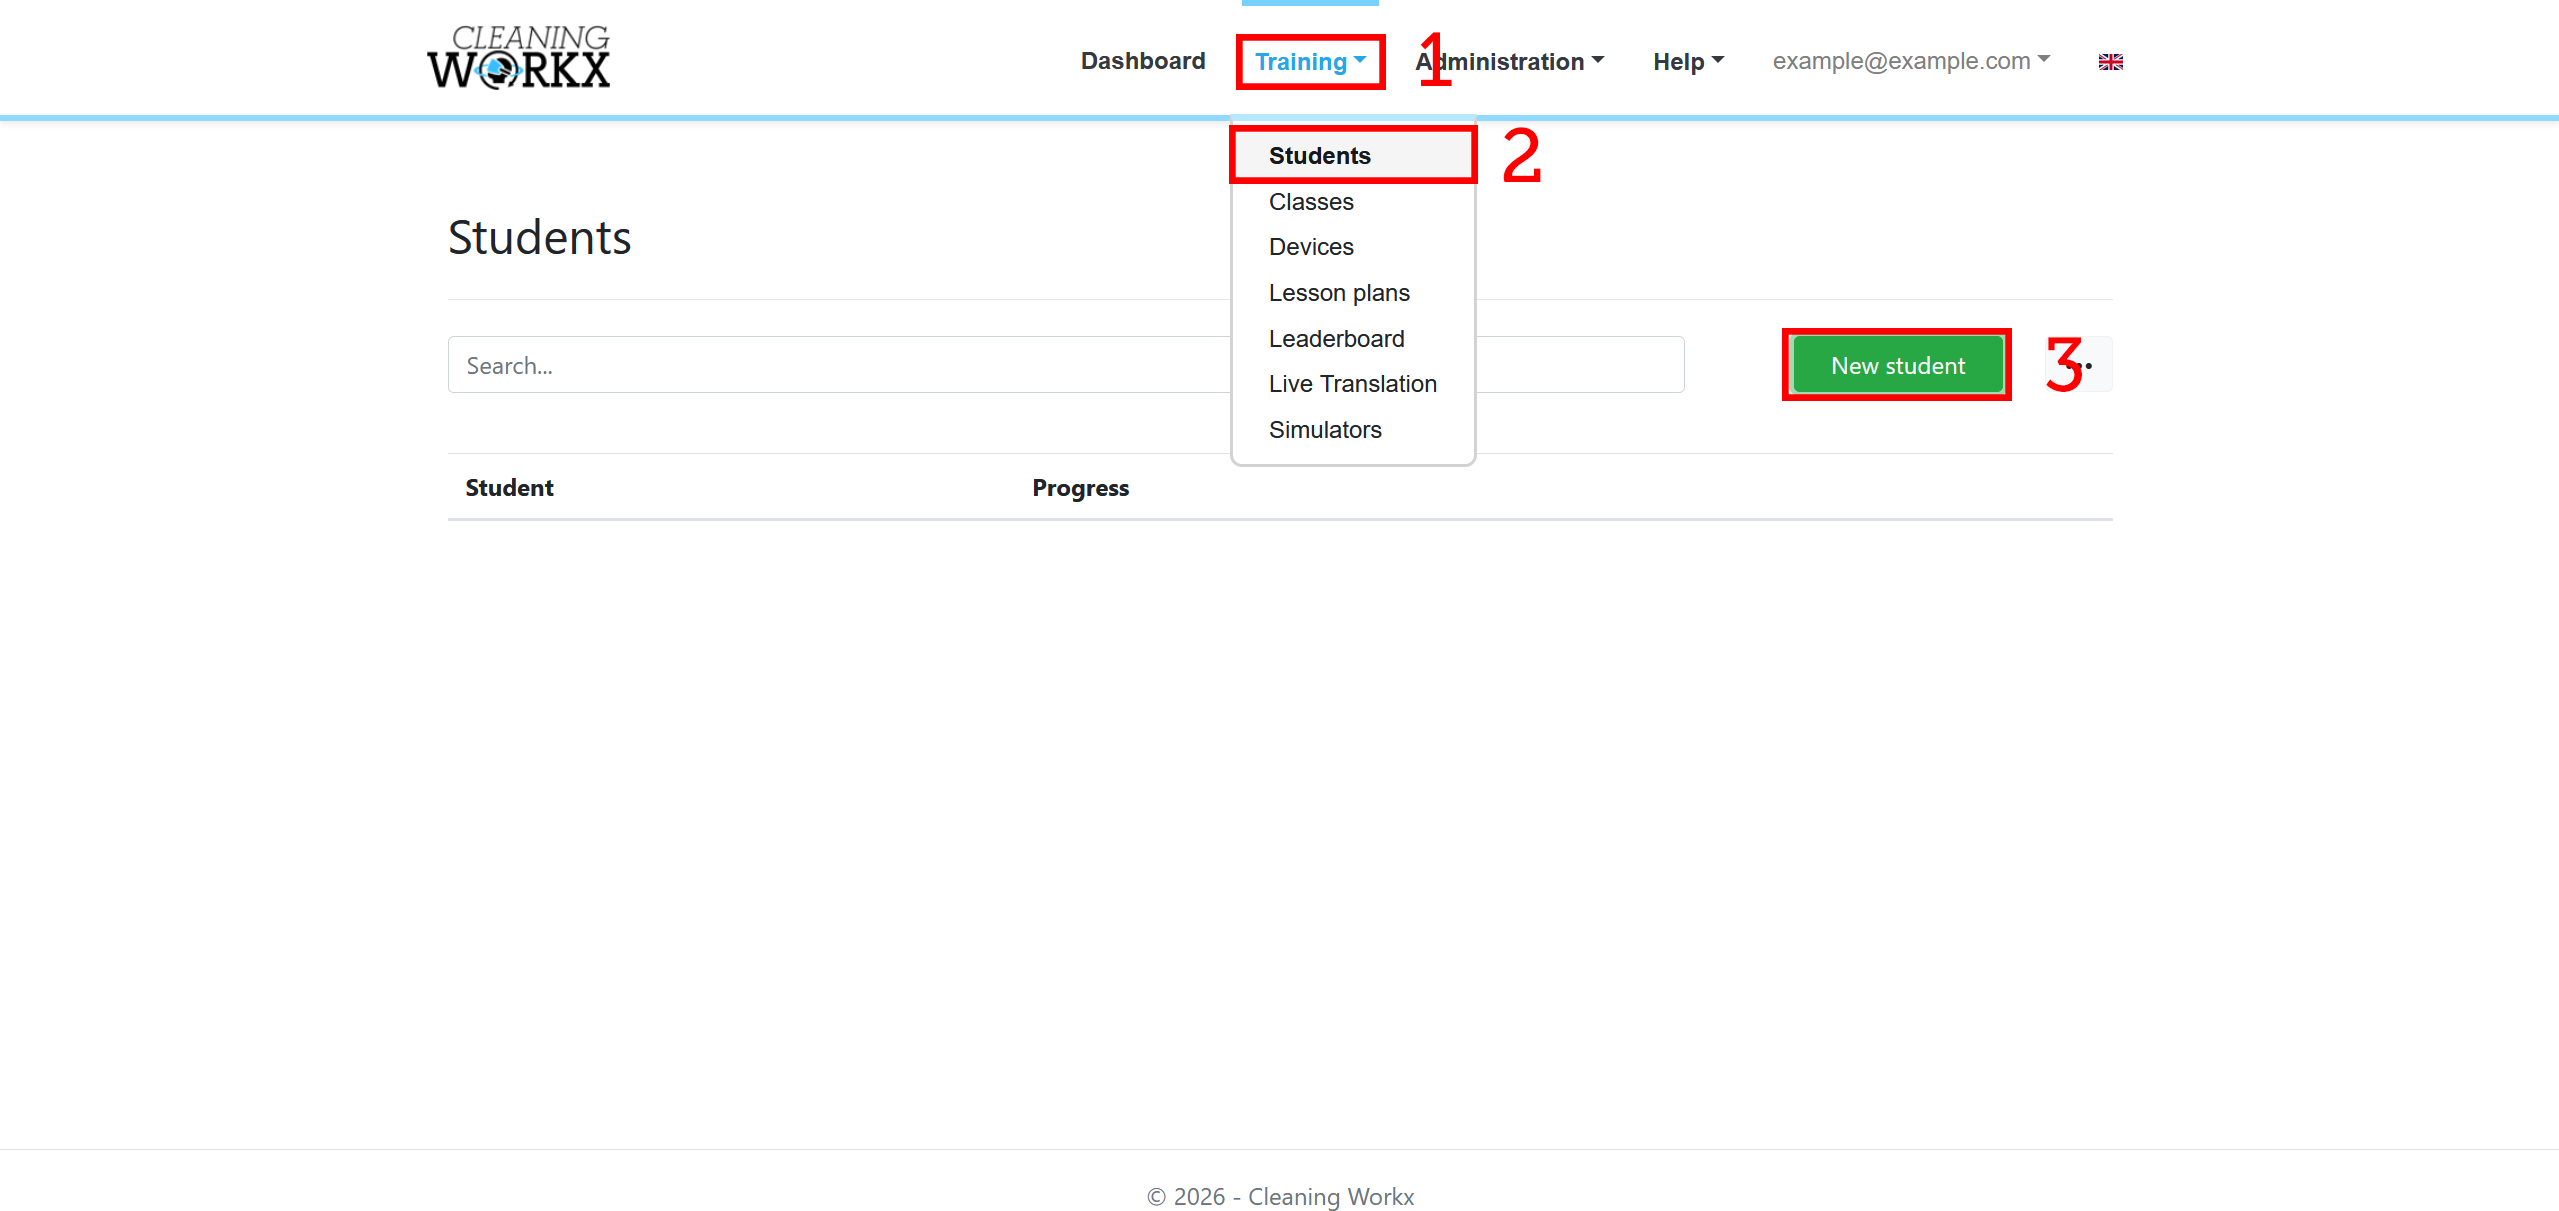
- Go to Training → Students.
- Click the New Student button.
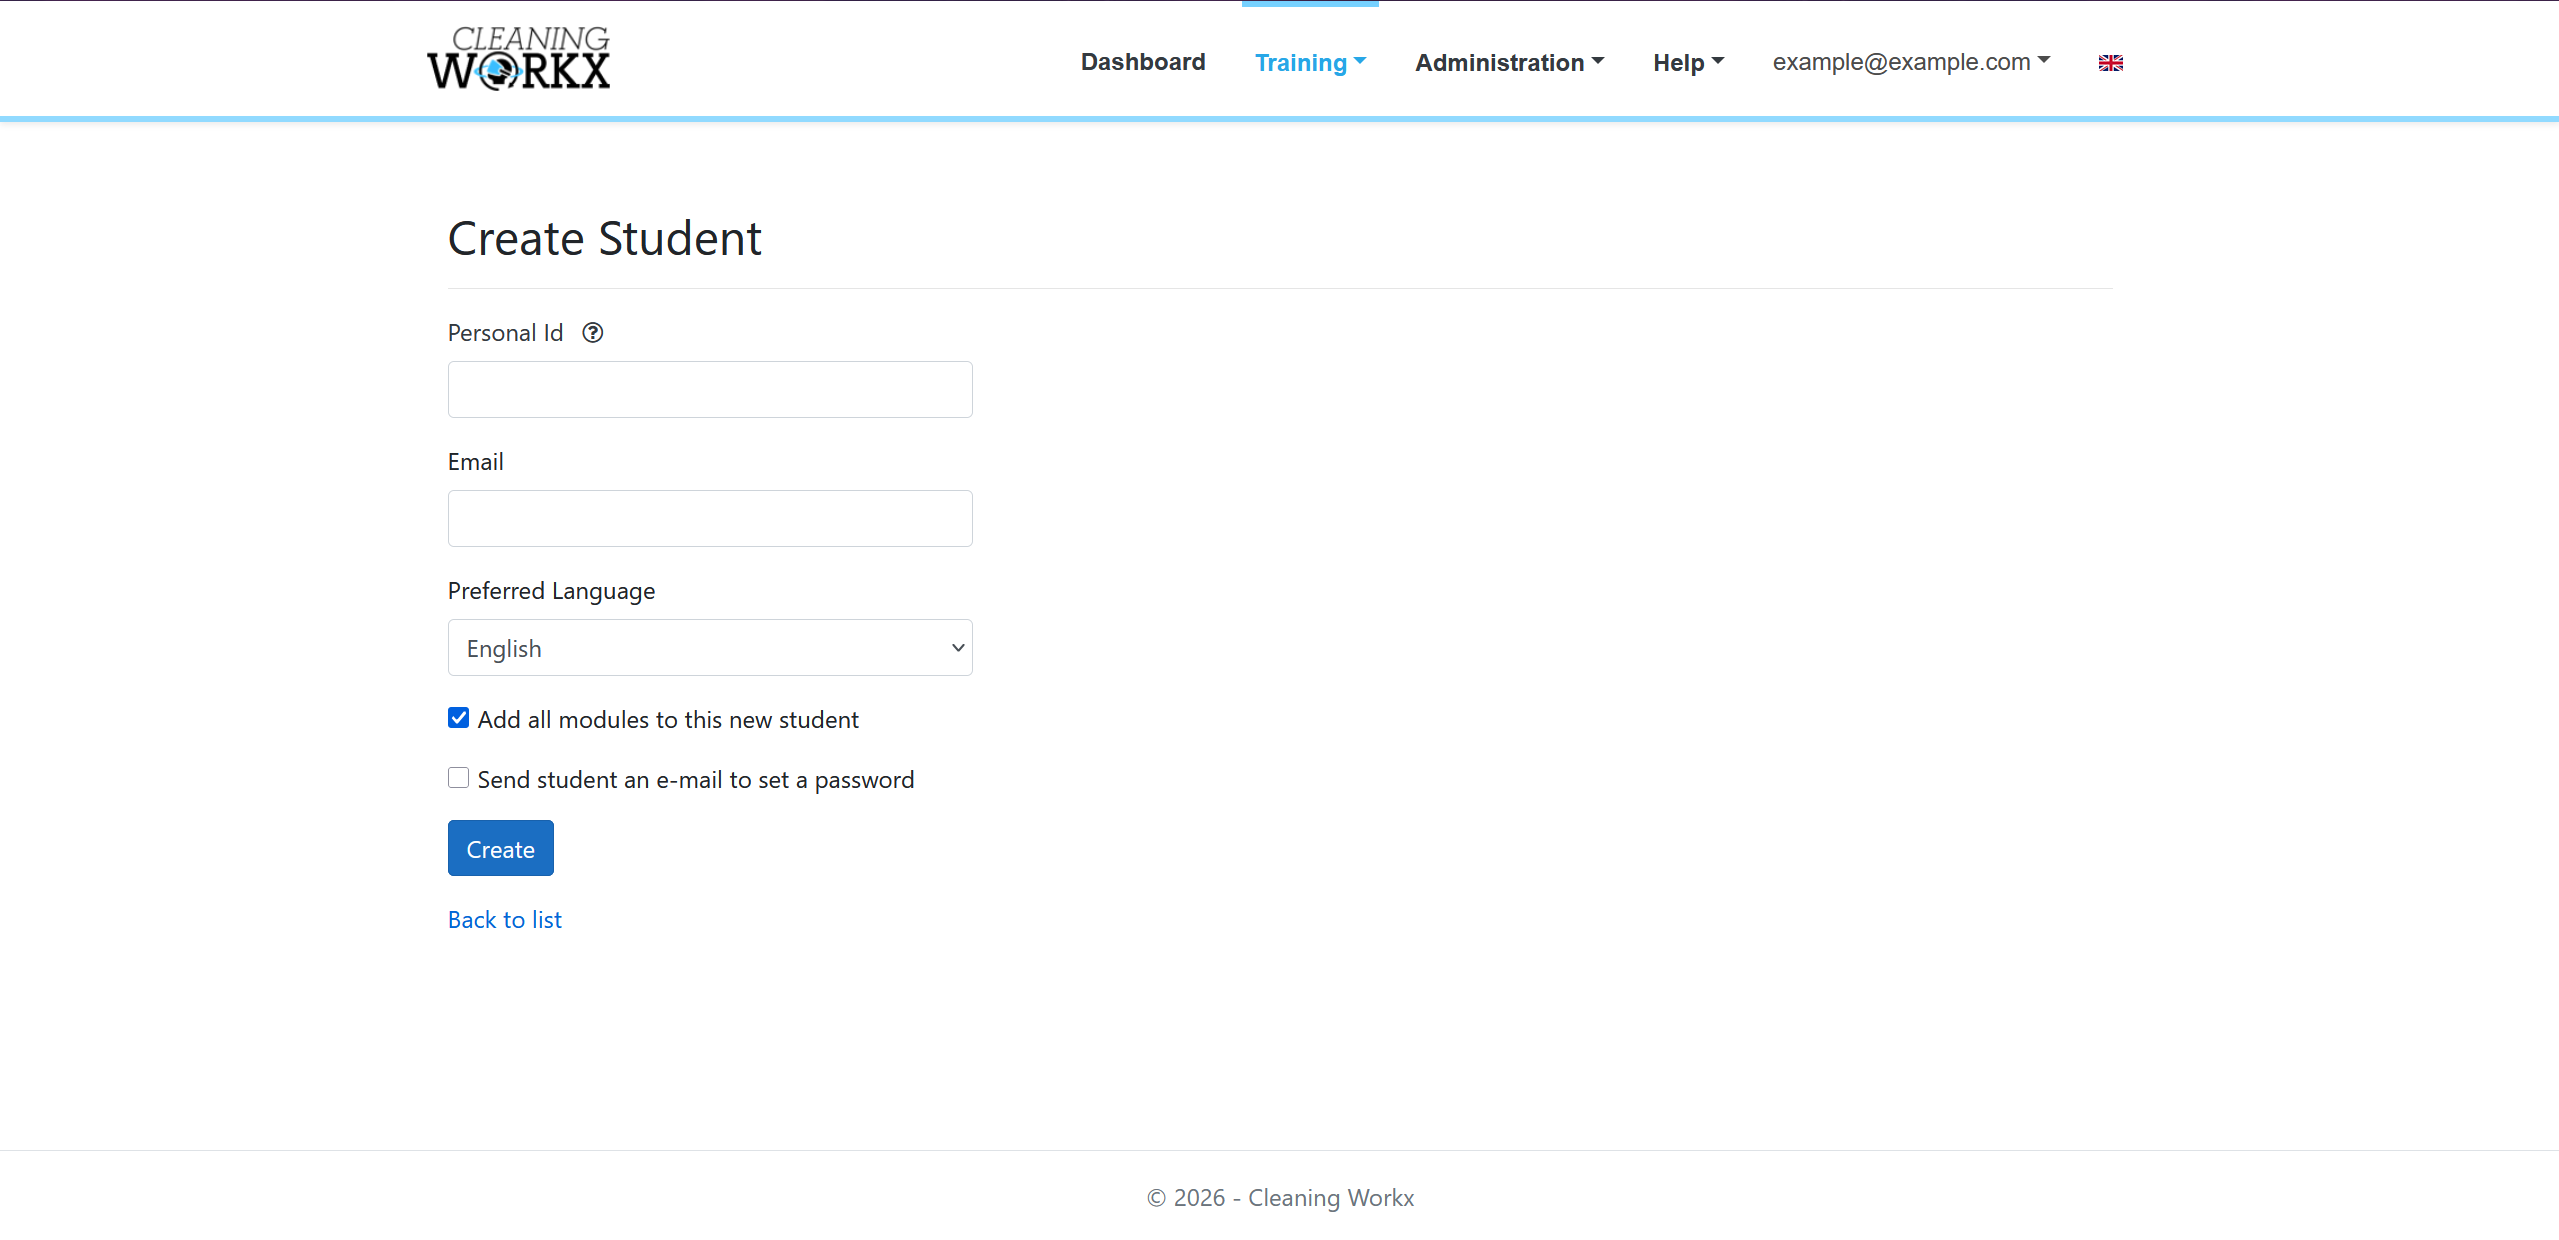
- Enter the student details.
Each student must have a unique staff number.
This number identifies the student during training.
2. Create a class
Classes allow multiple students to use the same headset and switch between users.
See Setting up classes.
3. Connect the headset to a class
To allow students to switch users inside the VR training, you must link a headset to a class.
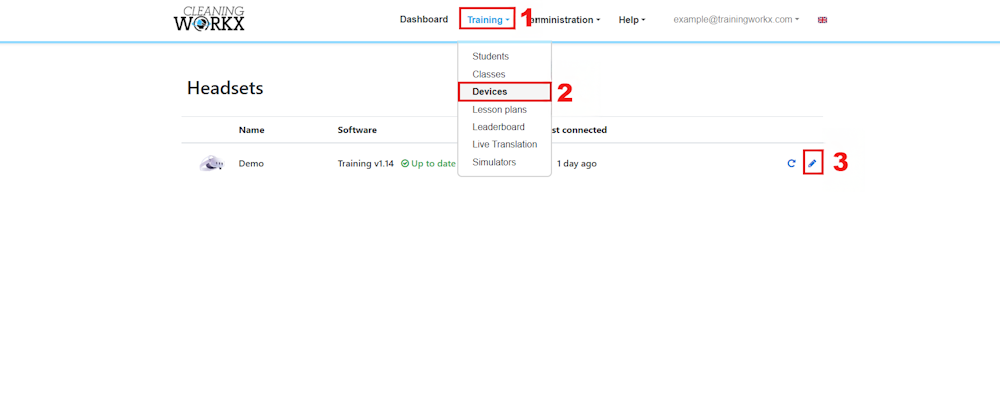
- Go to Training → Devices.
- Select the VR headset you want to use.
- Choose the class that will train on that headset.
Once connected, students from that class will appear inside the VR training and can be selected during the session.
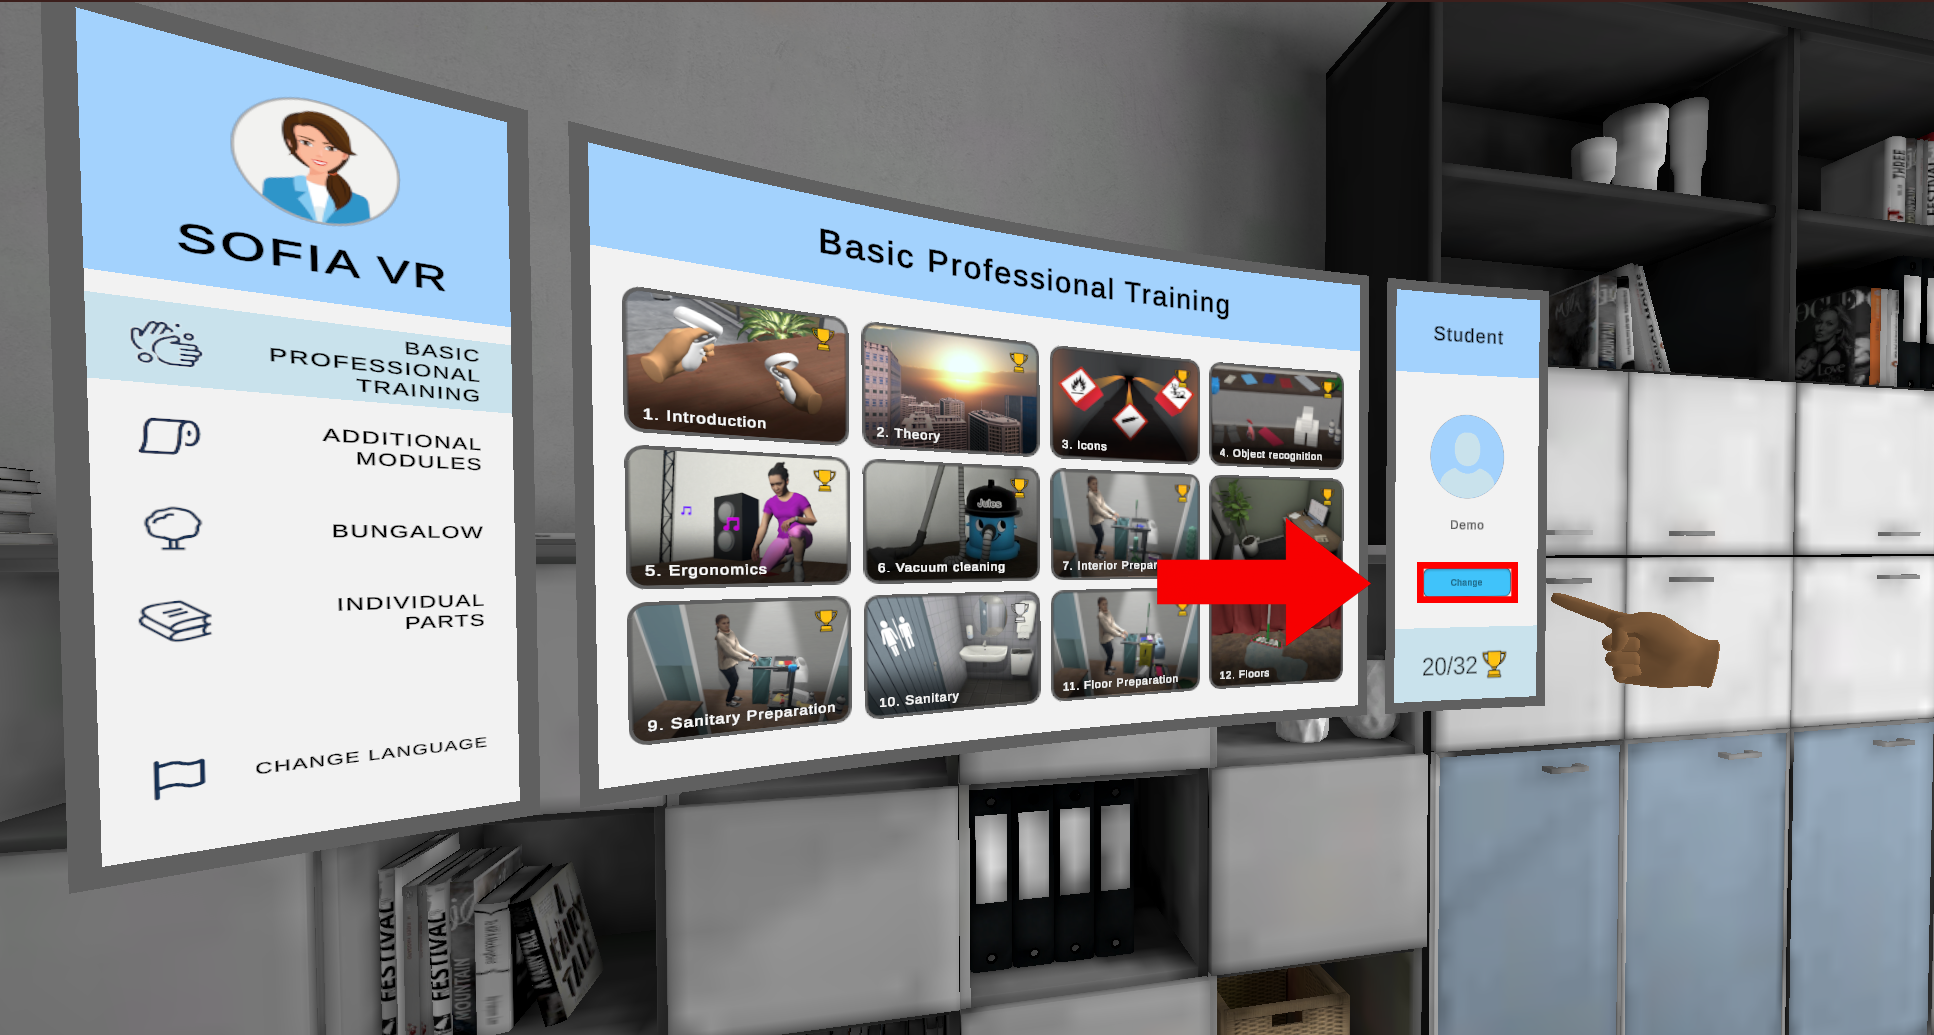
4. Switching students in VR
After the headset is linked to a class, students can switch users inside the VR training from the student panel next to the module selection screen.